Art for Kids Hub Origami Claws
hair friends were good for
paper
claws
yes we are all right heads ready to
fold
a
paper
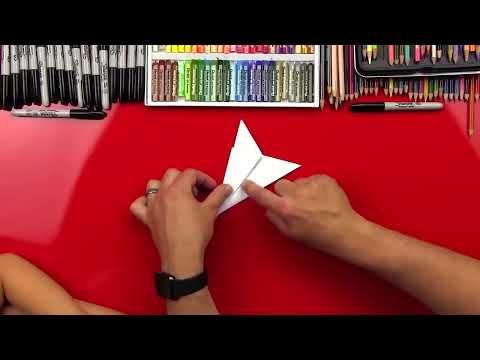
flock yeah okay you gonna be my helper we hope you guys are going to fall along with us it's important for this art project that we don't use a square piece of
paper
so we're using regular printer
paper
right out of our printer and it's eight and a half by yes by eleven good job give me five all right you ready for the first step yeah okay first step we're going to take this corner and

we're going to
fold
it up to the top okay or we could put it like this sometimes that's a little easier we'll
fold
this corner down to this side and so this edge is going to be lined up here and you're going to be my helper right so I'll line it up and then you
fold
it okay we'll get it down one second well done let me get it lined up make sure that there's a point up at the top like that all right do your thing right down the middle I love how you
fold
stuff good job
yes perfect and we want to make sure that that's nice and fit so we can take our fingernail down it a couple times too okay now we're going to take this corner up here and we're going to
fold
it down to this corner hey no it's going to look like a little house when we're done we'll
fold
that down and this is a fun project isn't it we've done this before and it was so much fun okay so I almost did your step okay ready
fold
fold
away good job squeaky fingers you did
it good yep and take your finger now and make it nice and crispy good job little girl okay now our next step and this is why we don't want a square piece of
paper
because we're going to take this if we had a square piece this piece would be missing so we have this and we're going to
fold
this corner up like this to that line okay
fold
away good job press it down good job you did it okay and then we're going to repeat that same step on the other side okay so we're going to
take this corner right here we're going to
fold
that one up to here you ready to
fold
it again there you go
fold
down the middle and then up to the edges perfect did it okay now we're going to take this bottom edge and we're going to
fold
it up so we're going to
fold
down this down this little crease here
fold
that up as far as we can go and then go ahead down the middle and then towards the edges perfect little cute fingers all right okay crease with our fingernail so it's
nice and crisp okay now we're going to
fold
it in half so we're going to
fold
this corner over to this corner okay all right here we go
fold
it down line it up and you press it down okay go ahead all the way down this edge down there little fingers use your muscles good job all right Kate now we're going to open it back up how it was okay so we've got our triangle and it's
fold
ed in half we're going to take this edge right here and we're going to
fold
it down the
middle and
fold
it to the middle so then
fold
it so there's a little point up at the top and it's okay if it gets a little wrinkly because the
paper
gets a little thick I'm going to press right there finish
fold
ing it good job did it awesome job okay now what we're going to do is we're going to take this
fold
and we're going to
fold
it back okay and then we're going to do another
fold
and
fold
down this line it's almost like you're kind of rolling rolling a
burrito oh now I'm hungry are you hungry for burritos alright so we got that
fold
ed down so we'll do that again okay so we'll start at the beginning so we
fold
ed this to the middle and then we
fold
it again and then we
fold
it one more time over like that and so this should look like a really long triangle right okay then we can open this back up and we're going to there's a little pocket right here you see that pocket okay put our finger in there and we can open up that
little pocket so that you can see inside it see that and then this corner is going to tuck inside of there so we'll
fold
it back like this and then we can tuck that piece down inside that cool looks awesome huh and then we're done does that look like a claw little bit so oh now this is how you turn it into a claw so it can go on your finger okay so we'll we'll squish it again so it opens up and that's where we put the little tab down in that pocket and then right here
there's another pocket you see that we can put our little finger inside there and open it up and then you can put your finger in there so it's a little claw you want to put your little figure in there yeah okay let's put it in there and that awesome has yes pretty cool huh it looks like a little claw you wiggle your finger and looks scary huh so we can repeat those same steps for each one of your fingers how many would we have to make yeah ten and you know what we did make ten
magically you put them on yeah all right let's do it let's speed it up whoa is that that's super cool huh they look like you're really scary monster or a cat with really long
claws
that cool yes and you have to be kind of careful because you got some points out here you want to make sure you don't pull anybody in the eyes with on right we want to be safe because those are pretty sharp did you have fun though your promise we hope you guys had a lot of fun making your
paper
claws
with us and we'll see later our friends good bye
Source : Art for Kids Hub
Art for Kids Hub Origami Claws
Source: https://youtuberead.com/how-to-fold-paper-claws
0 Response to "Art for Kids Hub Origami Claws"
Post a Comment